While Loops in Javascript

Coding in JavaScript is like preparing a delicious Indian feast—it requires the right ingredients, the correct sequence, and sometimes, a bit of patience. Just as every dish needs its unique method of preparation, every loop in JavaScript has its own purpose and method of execution. Today, we’ll dive into the while, do...while, and nested while loops. By the end of this article, you’ll not only understand these loops thoroughly but master them!
Introduction to Loops
Before we delve into the specifics of while loops, let’s briefly revisit the concept of loops in general. A loop in programming is like a repetitive task in real life. Imagine you’re making rotis for dinner. You don’t just make one and call it a day—you repeat the process until you have enough for everyone at the table. Similarly, loops in programming repeat a block of code until a certain condition is met.
Why Use while Loops?
The while loop is particularly useful when you don’t know in advance how many times you need to repeat a task. It’s like waiting for your train at an Indian railway station. You don’t know exactly how long you’ll be waiting, but you continue to wait (loop) until the train arrives (the condition is met) but keep checking your watch, again and again!
Let’s break down the while loop.
The while Loop: Repeating Until a condition is met
The syntax of a while loop is straightforward:
while (condition) {
  // Code to execute
}
The while loop continues to run as long as the condition is true. As soon as the condition becomes false, the loop stops, simple!
Example: Farmer waiting for the rain
Let’s take a real-life example that every Indian can relate to—waiting for the monsoon rain. Imagine you’re a farmer waiting for the rain to start so you can begin planting your crops. You don’t know exactly when the rain will start, but you keep checking the sky until it does.
let rainStarted = false;

while (!rainStarted) {
  console.log("Waiting for the rain...");
  // Simulate checking the weather
  rainStarted = Math.random() > 0.8;
}

console.log("Rain has started! Time to plant the crops.");
In this example:
- Condition:
!rainStarted- The loop continues as long as it’s not raining (rainStartedis false). - Iteration: The loop checks the weather until the rain starts (when
Math.random()generates a number greater than 0.8).
When you run this code, you’ll see a message that indicates waiting for the rain until the condition changes.
Let's take another example to understand better: Recharging Your Mobile Data
Another everyday example is recharging your mobile data. Suppose you’re trying to access the internet, but your data pack has expired. You keep trying to connect until you successfully recharge your data.
let dataRecharged = false;

while (!dataRecharged) {
  console.log("Trying to connect to the internet...");
  // Simulate a recharge attempt
  dataRecharged = Math.random() > 0.7;
}

console.log("Data recharged successfully! You are now connected.");
In this scenario, the loop continues attempting to connect to the internet until the recharge is successful.
The do...while Loop: Executing code at least once
The do...while loop is similar to the while loop but with one key difference: it guarantees that the code block inside the loop is executed at least once. Its like eating one cookie before making more, to check if it is good or not before emptying the cookie jar!
Here’s the syntax of the do...while loop:
do {
  // Code to execute
} while (condition);
Let's understand with an example:
let continueEating = true;
let cookiesEaten = 0;

do {
  console.log("Eating a cookie...");
  cookiesEanten += 1;

  // Decide whether to eat or not
  continueEating = Math.random() > 0.3 && cookiesEaten < 10;
} while (continueEating);

console.log("You either finished the Jar or are completely full");
In this example:
- Execution: The loop runs at least once, so you always eat at least one cookie.
- Condition: The loop continues if you decide to eat more and the jar is not empty
The do...while loop is particularly useful when you need to ensure that a block of code runs at least once, regardless of the initial condition.
Example: Bargaining at a market
Let’s take a more relatable example—bargaining at a local market. You might decide to start the bargaining process no matter what, and then continue as long as the shopkeeper is willing to negotiate.
let bargainSuccess = false;
let attempts = 0;

do {
  console.log("Trying to bargain...");
  attempts += 1;

  // Simulate bargaining success
  bargainSuccess = Math.random() > 0.5 || attempts >= 5;
} while (!bargainSuccess);

console.log("Bargaining ended after " + attempts + " attempts.");
Here, the loop ensures that you attempt to bargain at least once. The loop continues until you either succeed in bargaining or decide to give up after a few attempts.
Nested while Loops: Handling multiple conditions
Nested loops are like preparing multiple dishes simultaneously for a large family gathering. You might be frying pakoras while keeping an eye on the boiling dal. Just as you need to manage both tasks at the same time, nested while loops handle multiple conditions or tasks simultaneously.
Let's understand with the help of an example!
Organizing a cricket tournament
Imagine you’re organizing a local cricket tournament. You have multiple teams, and each team has several players. You want to ensure that each team has the right number of players before the matches start.
let teams = 5;
let playersPerTeam = 11;
let teamCount = 1;

while (teamCount <= teams) {
  console.log("Organizing team " + teamCount);

  let playerCount = 1;

  while (playerCount <= playersPerTeam) {
    console.log("  Adding player " + playerCount + " to team " + teamCount);
    playerCount++;
  }

  teamCount++;
}

console.log("All teams are ready for the tournament!");
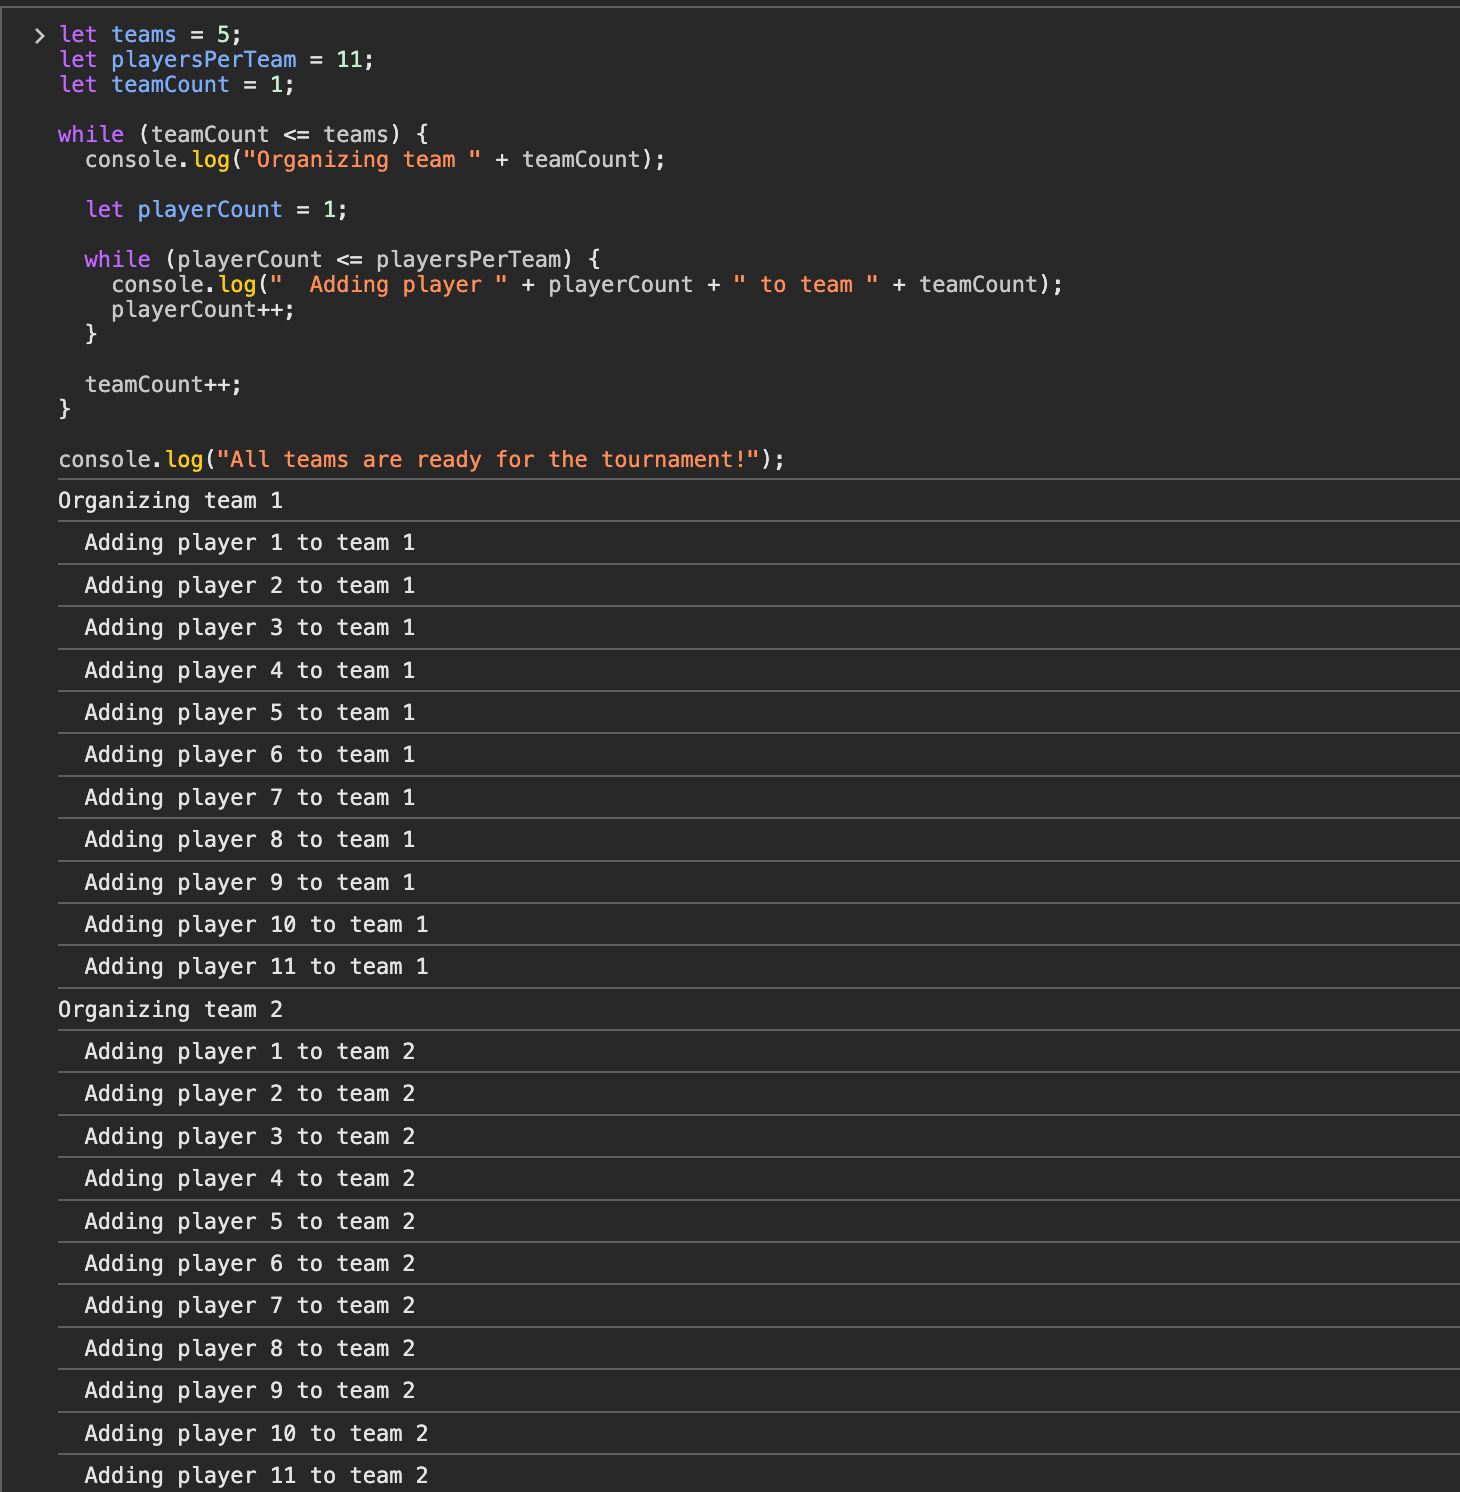
If you execute the code, you should see something like this.
In this example:
- Outer Loop: The outer
whileloop runs once for each team (5 times). - Inner Loop: The inner
whileloop runs once for each player in the team (11 times per team).
This nested loop setup ensures that all teams are organized with the correct number of players before the tournament begins.
Breaking Out of a while Loop
There are situations where you might need to stop a loop early, similar to how you might leave a crowded Dussehra mela (fair) if it gets too overwhelming. The break statement allows you to exit a loop before the condition is false.
Example: Searching for a Lost Item
Imagine you’ve lost your house keys in your living room. You decide to search for them, but as soon as you find them, you want to stop searching.
let foundKeys = false;
let attempts = 0;
let maxAttempts = 10;

while (!foundKeys && attempts < maxAttempts) {
  console.log("Searching for the keys...");
  attempts++;

  // Simulate finding the keys
  foundKeys = Math.random() > 0.7;

  if (foundKeys) {
    console.log("Keys found after " + attempts + " attempts!");
    break;
  }
}

if (!foundKeys) {
  console.log("Couldn't find the keys after " + maxAttempts + " attempts.");
}
The loop continues searching until the keys are found or the maximum number of attempts is reached. The break statement stops the loop as soon as the keys are found.
Phew! That was a long one, but we have understood about
whileloopsdo..whileloops and- Nested
whileloops
I hope you are now thorough with every topic discussed here and are clear about them, if not I am here to help you! See you in the next one.